Making Rose Beads – Step Three

Making Traditional Beads from rose petal “clay”
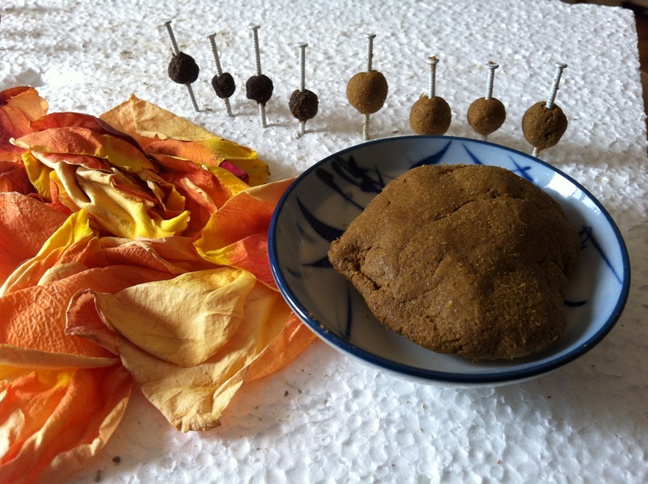
rose petals, rose clay drying, and finished rose beads

The rose petals became rose clay, which is on the plate, and then rose beads. The large ones will become more or less the same size as the smaller already dried ones.

If your rose clay is now dry and can hold a rounded shape, you can proceed to make balls, ovals, or even squares of clay as your beads. Traditional rose beads will shrink quite a lot, so if you want a bead of a particular size, make sure you make it bigger than the final size you are hoping for. I really recommend doing a little testing – you can make some test beads to check for shrinkage before you start to make the final beads.

Put a nail, brad, or beading pin through the bead to make the hole for stringing. I almost always use nails now, because the bigger hole is good if you have a heavier string, or use elastic beading thread. For bracelets I almost always use elastic. It is especially convenient for older people with arthritis. If you are sure you will use silk thread or something really thin, then you can use a thinner nail or beading pin.

You must move the bead up and down on the nail or pin or else it will actually stick to the nail and is almost impossible to remove. Take the bead off the nail after 24 hours unless the clay was very wet.

Before you string the beads, let them dry for a few days to a week.  Longer never hurts.  In warm weather they will dry faster in the sun, or if the weather is too cold, in a warm place such as over a radiator or in the oven if you have a pilot light.  When you wear the plain beads they will get darker and shinier from the oils in your skin.

Do not store rose petal beads in a plastic bag or they may mold.  It is smarter to leave them out in a dry place for several months to be sure that all the residual moisture is gone.  I like to store them in a box with some rose petals and a small cotton ball that has some rose oil essence on it.

Please don’t get water on your rose beads.  They look like some sort of natural or ceramic bead,  but if you get them wet from rain or jumping into a swimming pool they will disintegrate.  I know because I did tests.  If you do get some water on them, please dry them afterwards.  Treating them with sealers will keep that from happening.

Rose beads can be given a protecting coat of low gloss Tung Oil, which you can get in a hardware store, or you can use acrylic sealants that are used for crafts.  Make sure the sealer can be used next to your skin.   Even if you put some sealer on them, you still can’t go swimming with them on.  After a long time of trying different options for sealing the beads, I have settled on sealant, in order to keep them from staining clothes if it rains or you sweat.  You can rub in a little rose oil after the smell of the tung oil is gone if you want to help them retain their fragrance.

Making Rose Beads – Step Two

Step Two is all about making the rose petal bead dough smooth

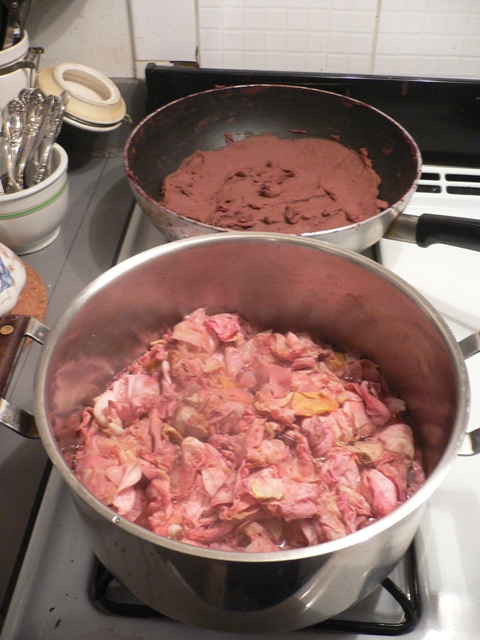
rosebead cooking before and after

Cooked rose petals before and after blending

4.5 from 2 reviews
Making Rose Beads - Step Two
 
Author:
Ingredients
  • 1 batch of rose petals (8-10 flowers), cooked thoroughly (see step one)
  • A regular blender or a stick blender (immersion blender)
  • Distilled water
  • Parchment baking paper
Instructions
  1. Take the cooked rose petals and put them in a blender (or use a stick blender) adding enough water for the mixture to get thoroughly blended, like a smoothie. It would be hard to blend it too much - but easy not to blend it enough.
  2. You can see in the picture the difference between the petals before they were blended and after.
  3. Make sure you're your final "glop" looks glossy and a bit like pudding, with no separate pieces of rose petal in it.
  4. Put it back in the skillet, and bring to just under a boil, stirring constantly. Simmer the mash until much of the water has evaporated off and the mixture is drier than applesauce. This is an art - you will need to try several times until you get the feeling. If your rose petal sauce is as wet as apple sauce, you will not be able to add much to the clay. It is better to have it dry, like a dry jam, or even like a clay.
  5. I like to put the dry mash on parchment paper and let it sit in my oven overnight. Since it is a gas oven, the pilot lights keep it ever so slightly warm, and the clay dries out. You can peel it off the parchment paper in the morning.

 If you are finished with step two, now you can go on to step three.

Step One – Making simple rose beads

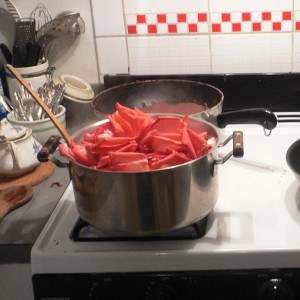
cooking roses to make beads

You start by cooking the petals

What flowers should I use?
I first developed this recipe when I wanted to try making rose beads from a friend’s wedding bouquet. But the fact is, you can make these beads anytime, for any celebration, graduation, birth of a baby or grandchild, when you have Valentine’s Day flowers, or just go into your own garden when there are blooming flowers. You can also buy flowers at the store and enjoy them until they begin to get a little tired looking.

How fresh do the flowers have to be?
It is not necessary to use extremely fresh flowers.  If your local flower shop has older flowers they are throwing away, then these are fine to use too.

Will other flowers work?
Try any flower in your garden. You will be pleasantly surprised at the results. If you would like to know more about other flowers that work well, click on the link on the right to get on the list to be notified when the e-course comes out.

4.9 from 7 reviews
How to make beads from rose petals and other flowers - Step One
 
The first step to making rose beads. Preparing to make the beads is the most important part. You will not only need flowers, but you will need other supplies. For making the rose dough you will need:
Author:
Recipe type: Rose Bead
Ingredients
  • Petals from at least 8-12 roses
  • Distilled water
  • Frying pan - non-stick, or if you want the traditional black beads you should use a traditional black cast iron pan. Grandma's old cast iron chicken fryer works well.
  • Blender (critical for smooth, good-looking beads)
Instructions
  1. Remove the petals from 8-12 roses. Do not include the ball inside the flower that becomes the rose hip later, and try to knock out all the little round seed-like things from inside the bud before putting the petals in the pot.
  2. Snip the petals into strips using a sharp scissors and put them in a no-stick or cast iron frying pan.
  3. Add about ½ to 1 cup water (using distilled water guarantees a purer fragrance) and cook just under the boiling point until the petals get soft.
  4. Be careful not to let all the water evaporate. Keep watching the pot carefully and add water if necessary, stirring to make sure they cook evenly.
  5. When the petals are very soft, turn the mixture off and let it cool. They should look a bit translucent, like a cooked vegetable. This is the first step to creating the dough from the petals.

If you are finished with Step One,  you can now go on to Step Two.